3D design
The 3D visualization lecture together with the 3D animation course formed the 3D design module. In the 3D visualization lecture, a robot was designed with the help of the 3D program Maya and went through from the idea to the modeling to the finished figure. The 3D animation lecture built on this and the previously created robot was animated accordingly in the following semester. The aim of the lecture was to get to know a process flow of a 3D visualization production and to be able to apply it in a project. Getting to know the approaches, tools and technologies of 3D production is fundamental to this process.
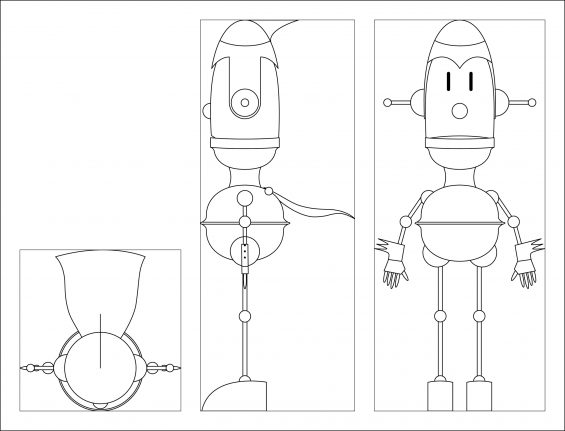
Within the project, the conception and preparation of a 3D visualization project, the robot, was started. A basic understanding of the processes in the program was then conveyed so that these processes could be transferred to one’s own project. The aim of the entire module was to use the 3D program to create a short film sequence of a robot performing an action within the sequence. The process was based on the chronological sequence of a real 3D production. First, an idea was sought as to what type of robot should be visualized and replicated. A robotic sculpture by artist Lawrence Northey was chosen and as good illustrations of the model did not exist, template drawings were made showing the figure from the front, top and profile.
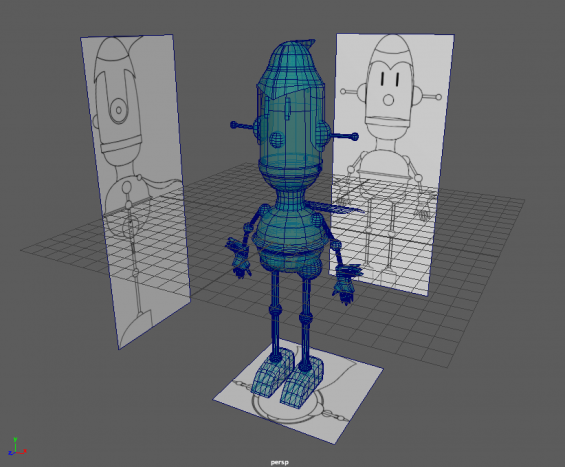
The next step was the modeling of the robot figure and the Maya program was also introduced. After modeling was complete, shading and texturing followed. Materials and textures have been applied to the already modeled robot, giving it an individual appearance. After this process was completed, the light was set in the scene. The lighting is important for the output of the rendered image and offers different possibilities to illuminate the scene. After these steps were completed, the scene could be rendered. The setting options for rendering were adjusted and the Mental Ray plug-in was also used, whereby more complex textures can be used. Finally, post-production followed, in which the rendered image was also edited.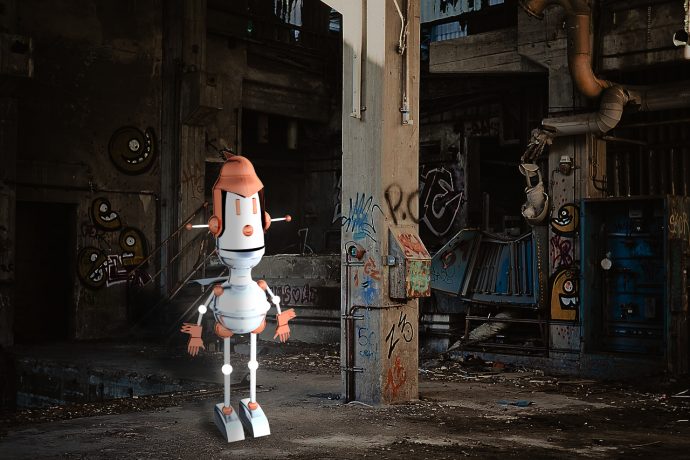
3D animation
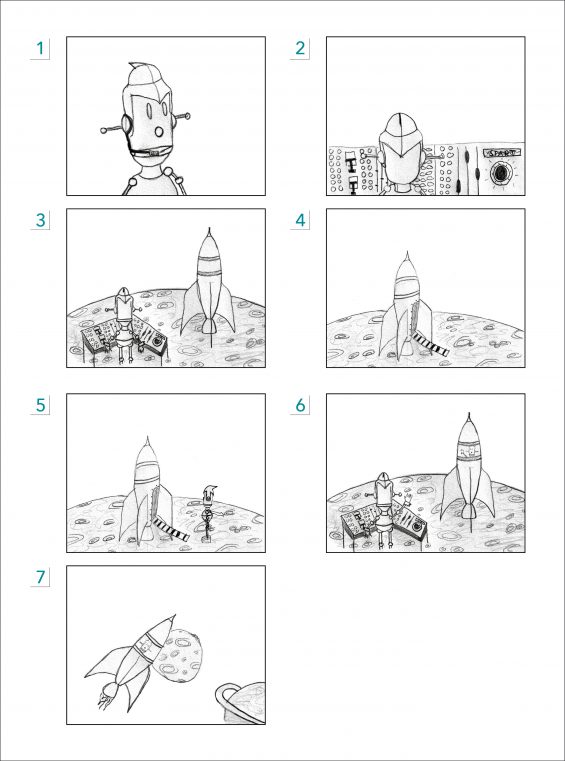
Based on the previous steps, the previously modeled robot has now been animated. In the previous lecture, care was taken to ensure that the robot has all the properties it needs to be animated. Getting to know the approaches, the tools and the technologies of a 3D animation was fundamental for this process. The animation process is divided into three parts: Planning, Blocking and Final or Polish. These parts include the detailed planning of an animation process, creating the animation sequences, timing and fine-tuning. The aim of the entire module was to use the 3D program to implement a short film sequence of a robot performing an action within the sequence. In addition to the robot already modeled in the previous steps, additional modeled objects were added for the animation, which were also based on the design of the sculptures by the artist Lawrence Northey. Now the robot and the other elements, such as his rocket, should come to life by animating them. At the beginning it was considered what the idea for the animated robot meant. In the next step, the description of the animation process was completed and then visualized in the storyboard. In order to plan the animation in more detail, a planning sketch was created in which the timing of the sequence was shown above all. After this planning was completed, the modeling and shading continued. Other objects were modeled in addition to the robot and the materials and textures were applied to them so that the objects could be given an individual appearance. Once the basics had been established, the main task, animation, was carried out.
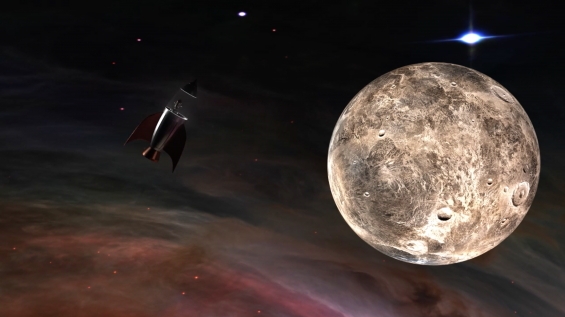
The animation principles established by Pixar founder John Lasseter in 1987 were also taken into account. After this process was completed, the light and camera were set in the scene. The lighting is important for the output of the rendered image and offers different possibilities to illuminate the scene. The camera is also crucial for the finished film sequence, since it determines the perspectives and different setting sizes. The sequence could then be rendered. Some setting options were taken into account when rendering and plugins such as Mental Ray were also used. Ultimately, the film sequence had to be put together in post-production, since the animation consisted of 1985 frames.